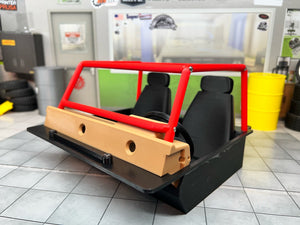


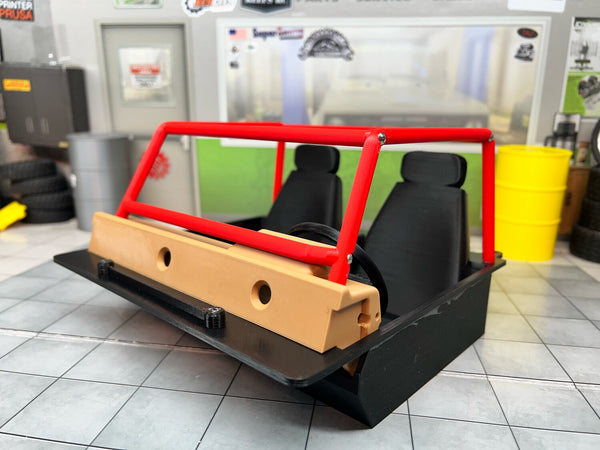

This interior fits the Element RC Bushido (Parts will be printed in black)
It takes 35 hours to produce a complete interior. Please assume it will take a minimum of 3 Days for your order to ship.
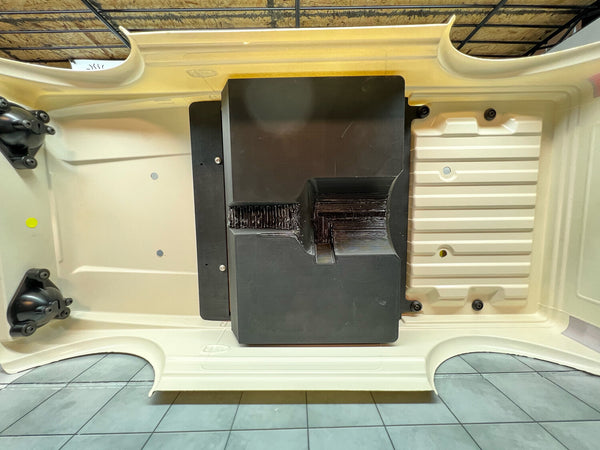
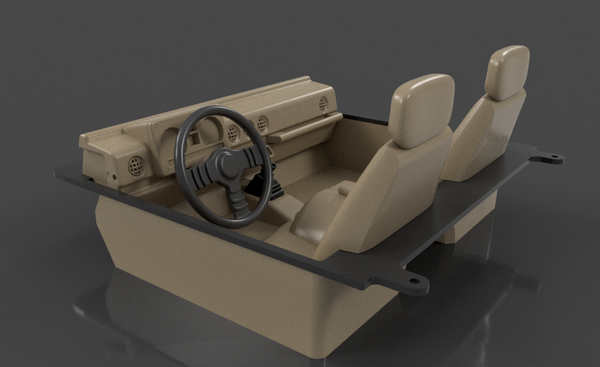
The interior is designed for the stock Bushido configuration (SHORT BATERY TRAY). The hand break and shifter boot have a hole in the top for and M3 Screw. The idea is to use a Ball stud or screw to complete the look of the handle.
Hardware needed: 2 - M2x5x8, 2 - M3x8, Glue. Paint
To install:
The rear of the Top Plate will mount to the rear screws for the stock role cage in the bed. The front of the Top plate will mount to the underside of the hood with either glue or the hood vent with two screws through the body. All other parts will be secured to the top plate for installation.
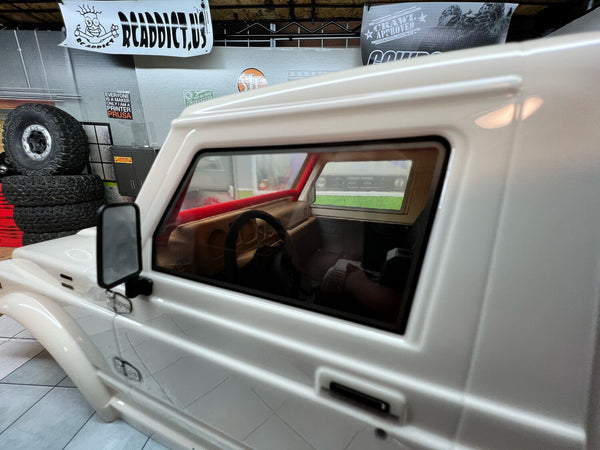
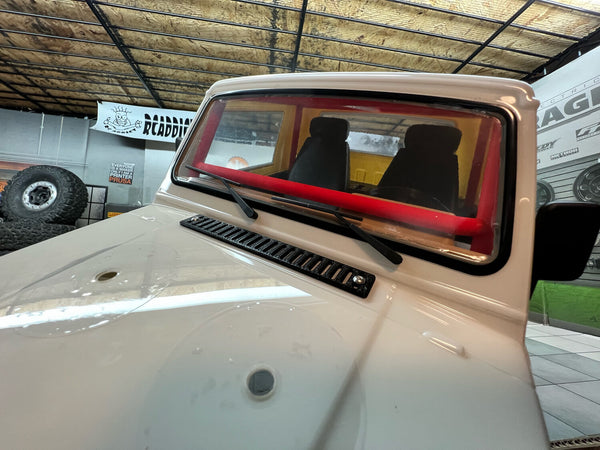
Optional Cage Note: The underside of the top plate and the back of the dash have registration marks for you to drill the needed holes to screw the optional cage to the dash and top plate. If you don't want the cage, there will be no holes to muddy up the look.
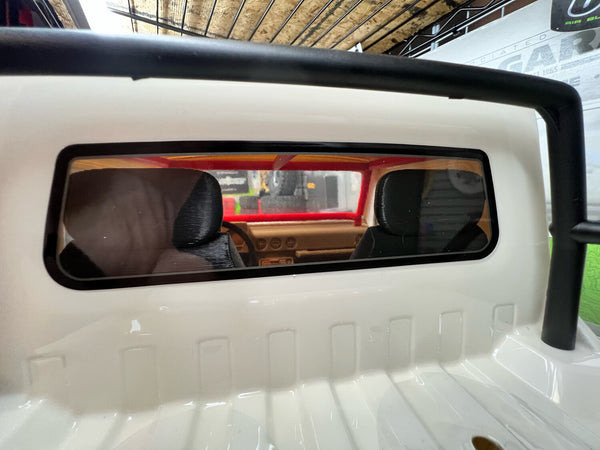
Dash Note: The holes in the side of the dash will capture the posts of the side mirrors. Make sure the D of the body clip is facing the front of the truck for clearance. It is possible to use only the dash mounted to the mirrors and tacked in place with some hot glue. this option is nice for those who want to make a light weight interior out of other materials and not want the weight of the 3D Printed Tub.
The body with all interior components installed will weigh about 1lb 3 oz. You may need a heaver spring weight to compensate for the added "realistic" weight.
To install the Bed components, you must do it in the following order. 1) Remove the radiator, 2) Slip the bed sides between the fuel cell and the cage (It's a Snug Fit But It will Go), 3) Slide in and glue (Shoe Goo/E-6000/Hot Glue) the bed bottom to the side inserts(From Underneath), 4) Install the bed cap and glue or fasten with Zip Ties, 5) Glue/Zip sail panel in place. Use 2x M3 studs (Not Provided) and nitro fuel tube (Not Provided) to mock fuel fill. 6) Install the Radiator
Note: Zip Ties Must be Small (1.4x2.5mm Opening)
Due to the nature of 3D printing, items may contain tiny visual blemishes. Items may require some trimming and painting for optimal visual appeal/fit; similar to what you would expect to do with model parts.
IMPORTANT: Do not use power drivers on 3D printed parts. Over tightening printed parts and cause premature cracking and crushing. Always ensure you hardware will not bottom out in the screw pocket. This can also cause at 3D printed part to break prematurely.
Printed Parts - These parts will be printed in Black (Unless otherwise requested) using advances slicing methods for maximum strength. All 3D printed parts come with a lifetime replacement guarantee. If you break a part, simply send us a photo and your order number. The photo is simply to evaluate for common issues and help identify potential improvements to existing designs.